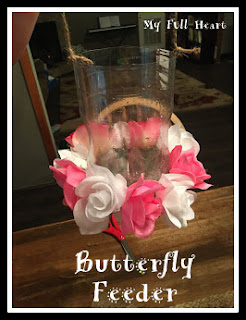
To conclude our study of butterflies and moths, we made a butterfly feeder to hang in our yard! It was a pretty easy activity to do and looks really nice hanging from a tree.
The supplies you will need for your butterfly are:
an empty clear plastic 2-liter bottle
fake flowers
twine or yarn
hot glue gun
hole punch
cotton balls
thumb tack
For the food:
sugar
water
The first thing we did was cut the top of the bottle.
Next, we took a thumb tack and poked a hole in the bottom side of the bottle.
Then we took the plastic flowers off of the stems.
We poked one of the flower stems through the hole we made with the thumb tack. I hot glued the petals to the bottle to hold it on.
The kids took turns hot gluing the flowers around the bottom of the bottle.
Next I took a cotton ball and hot glued it to the center of the flower that I had poked through the hole. I also hot glued a cotton ball inside the bottle around the same hole.
We used a hole punch to make holes in the top of the bottle and threaded some twine through the holes so we could hang it up in a tree.
We mixed up about 1/8 cup of sugar with some water in the bottle for the butterfly food and hung it in a tree!
(Unfortunately it started raining so we haven't seen any butterflies at our feeder yet.)
The kids had fun making this butterfly feeder! Hopefully we will see some butterflies soon.
Check out our other projects in my 100 Days of Art Challenge!


No comments:
Post a Comment